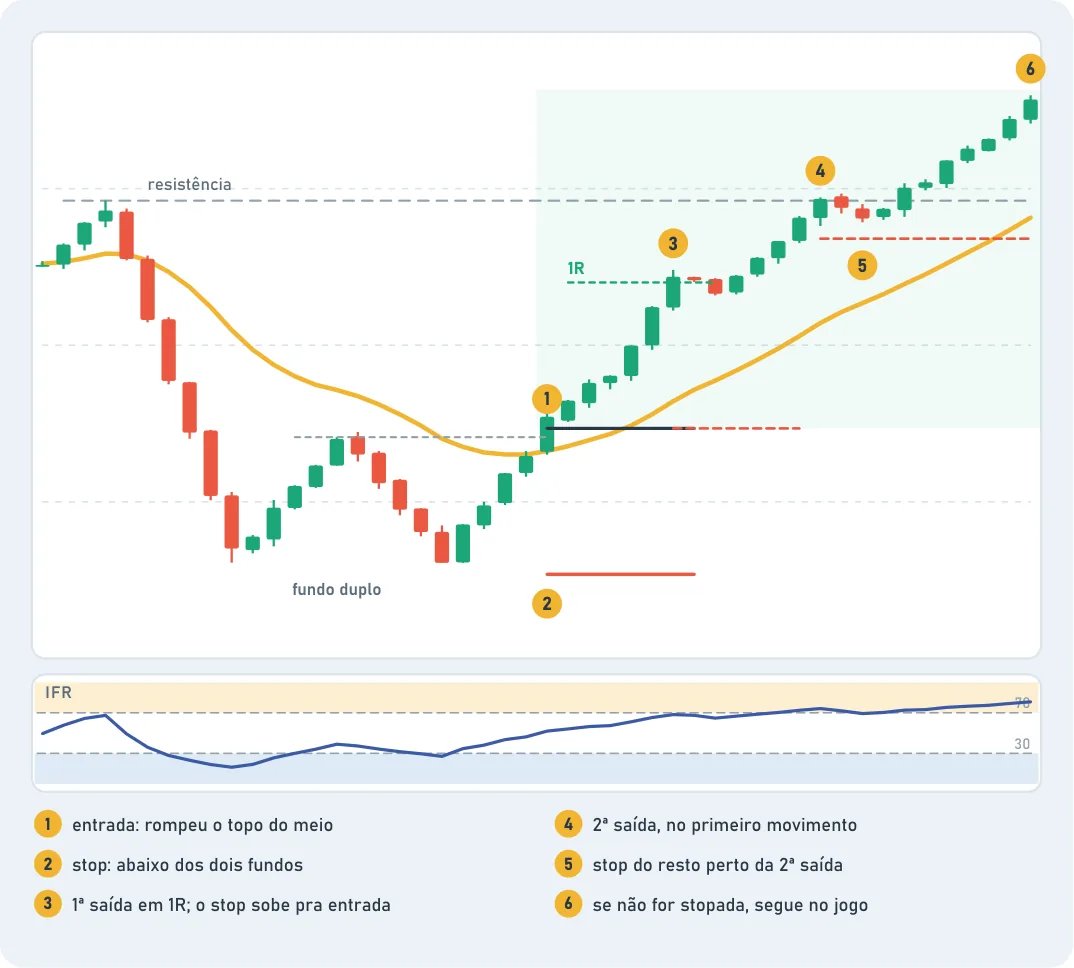
Three prices. One way to think about a trade before you get in is to answer three questions:
- Where I get in. The point where the setup confirms.
- Where I'm wrong. The stop. The price where the idea dies.
- Where I get out right. The target. Usually the next important support or resistance.
Without all three answers, it's closer to a bet than a trade.
The entry. Getting in too early is buying a pattern that doesn't exist yet. Getting in too late is buying when the risk has already gotten big. An entry close to the stop makes the risk smaller and the room to the target bigger.
Three kinds of entry.
| Kind | What it looks like | Pros and cons |
|---|---|---|
| On the breakout | You get in when the price crosses the level | You catch the whole move, but you get caught in more false breakouts |
| On the retest | You wait for the price to come back to the broken level and hold | More confirmation, but sometimes the retest doesn't come and you're left out |
| On the touch | You get in when the price touches a support or the moving average and reacts | Very tight stop, but it needs confirmation on the smaller chart |
The exit in three parts. Nobody has to get out of everything at once. One way this book uses as a guide, not as a rule:
First exit. When the price moves your way (for example, the same distance as the stop: , chapter 17), take part off. The stop on the rest moves up to the entry, or close to it.
Second exit. On the first real move, near the next important support or resistance. Take another part off.
The last part. It stays in the trade with the stop above or near the second exit. If the price comes back quickly, it gets stopped out soon after the second. If it doesn't, there's a saying for that: you still have a horse in the race.
It's a guide. The size of each part, where each exit goes and when to move the stop change from trade to trade and from person to person. The figure shows one way. Do your own research (DYOR): study, test and find yours.
Get in in parts or all at once? Getting in in parts improves your average price while the price is still swinging, but it only works with the total risk set in advance. Getting in all at once is simpler and makes the stop clearer. Neither one is always right. A mistake that shows up a lot is adding to the position just because the price went against you and the loss is hard to accept.
The examples for each setup. Each chapter from 1 to 14 has a figure drawn with a possible entry, stop and exit for that setup. They're examples, not orders. This chapter's figure shows the whole trade, with the three exits.